Oily lids are the biggest challenge in eyeshadow wear time. Your skin produces excess sebum on the eyelid surface, and that oil dissolves the binding agents in eyeshadow powder, turning a crisp gradient into a muddy crease line by mid-afternoon.
Primer helps, but primer alone isn’t the whole solution. The way you prep your skin before primer, how you apply the primer, and what you do after priming all affect whether your eyeshadow makes it through a full day or starts migrating within a couple of hours.
This is the complete prep-to-finish method I use on my own oily lids and on clients with the same skin type. Every step matters.
Why Oily Lids Are Different
Most eyeshadow advice assumes relatively normal skin. The standard approach of applying primer and then shadow works fine on balanced or dry lids. But oily lids introduce a specific problem: your skin continuously produces oil throughout the day, and that fresh oil seeps through your primer layer from underneath.
That’s why a simple swipe of primer isn’t enough. You need a multi-step approach that manages the oil before, during, and after shadow application.
The eyelid skin is thinner than most facial skin, has fewer pores but active sebaceous glands, and folds on itself every time you blink. That constant folding concentrates oil right at the crease point, which is exactly where most eyeshadow breakdowns begin.
Step 1: Blot Before You Prime
Start with clean, bare lids. If you’ve already applied moisturizer or sunscreen (which you should), let it absorb for at least 10 minutes. Then take a clean blotting paper or tissue and press it gently against each eyelid. Don’t rub. Just press and lift.
This step removes the surface oil that’s already present. If you skip it, your primer is going on top of an oil layer, which defeats the purpose. Think of it like painting a wall: the primer only bonds properly to a clean surface.
Some people use micellar water on a cotton pad for this step, which is fine. Just make sure the lid is fully dry before moving on. Any residual moisture under the primer will compromise adhesion.
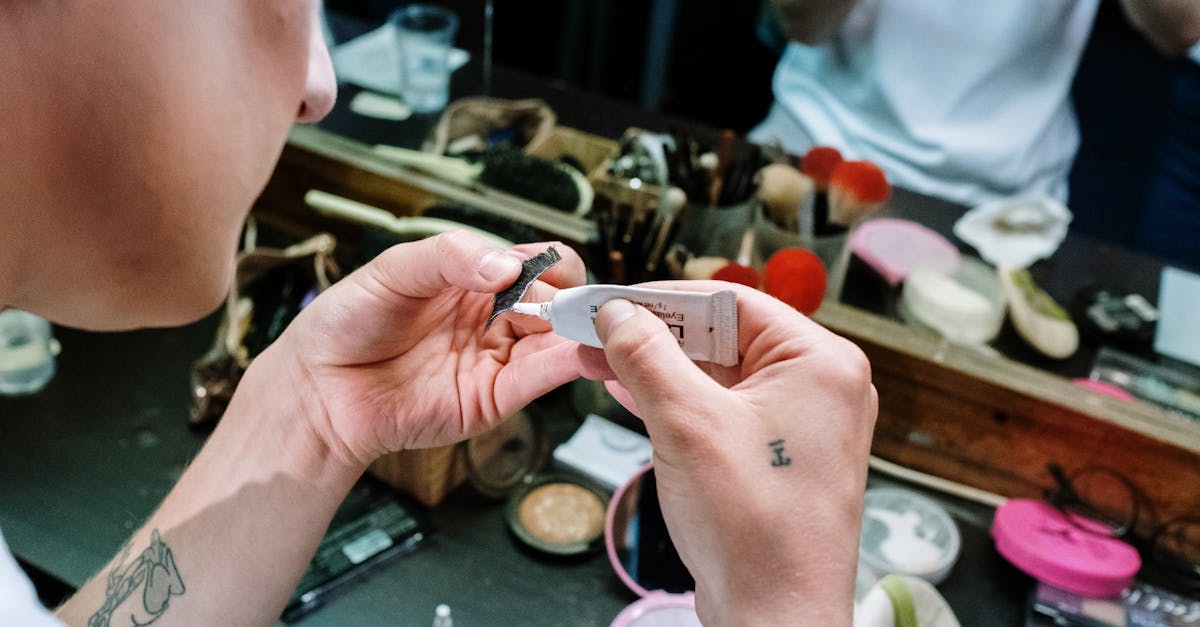
Step 2: Apply Primer the Right Way
The biggest mistake with eyeshadow primer is using too much. You need about a grain-of-rice amount for both eyes combined. Seriously. More is not better here.
Using your ring finger (it applies the least pressure), dot a tiny amount on each lid and blend it from lash line to brow bone in a thin, even layer. The coverage should be sheer enough that you can barely see it on your skin. If you can see a visible layer of product, you’ve used too much.
For oily lids, mattifying primers outperform standard primers by a wide margin. Look for these key ingredients:
- Silica: Absorbs oil and creates a matte, smooth surface
- Kaolin clay: Draws oil away from the skin surface
- Dimethicone: Creates a barrier between skin oil and shadow
- Polymethyl methacrylate (PMMA): Blurs pores and absorbs sebum
Avoid primers with glycerin, shea butter, or heavy emollients listed in the first five ingredients. These add moisture and slip, which is the opposite of what oily lids need.
Product picks for oily lids:
- Urban Decay Eyeshadow Primer Potion (~$28): The standard bearer. Mattifying, sets quickly, works on very oily skin.
- Milani Eyeshadow Primer (~$8): Budget pick that genuinely performs. Slightly thicker than UD, so use even less product.
- NYX Professional Makeup Proof It! Waterproof Eyeshadow Primer (~$9): Waterproof formula that resists oil breakthrough well.
Step 3: Set the Primer
This is the step most people skip, and it makes the biggest difference for oily lids.
After your primer has dried (60-90 seconds), take a fluffy brush and dust a light layer of translucent setting powder over your entire primed area. The powder creates an additional oil-absorbing barrier and gives your eyeshadow something to grip onto.
You don’t need much. A light dusting is plenty. Too much powder creates a cakey base that interferes with blending.
If you don’t have translucent powder, a matte eyeshadow close to your skin tone works as a substitute. Just apply it all over the lid as a base layer.
This three-layer approach (blotted skin + primer + powder) is what professional makeup artists use on brides and models who need their makeup to survive 12+ hour days under hot lighting.
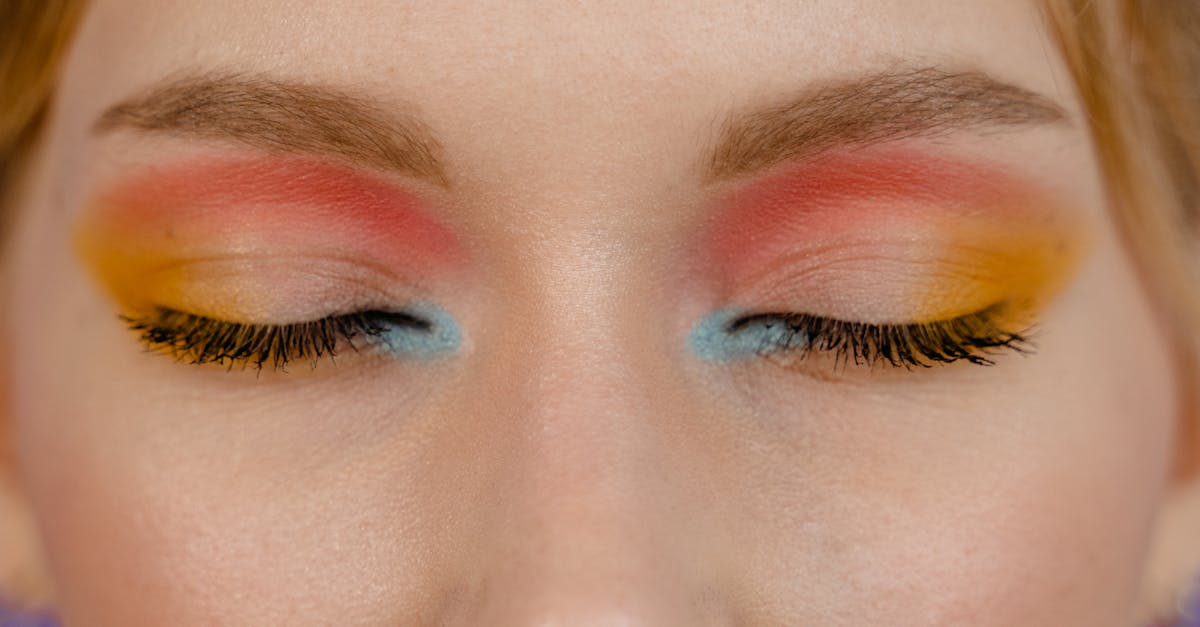
Step 4: Build Color Strategically
With your base prepped, apply eyeshadow using these oily-lid-specific techniques:
Pack, don’t sweep. Instead of sweeping shadow across your lid in one motion, press your brush into the shadow and then press it onto your lid. This packing motion deposits more pigment with less disturbance to the primer layer beneath.
Build in thin layers. Multiple light applications bond better to a primed surface than one heavy application. One thick layer of shadow is more likely to crack and crease than three light layers.
Use your best brushes. Dense, short-bristled shader brushes deposit shadow more precisely than fluffy brushes for lid application. Save the fluffy blending brushes for the crease and transition shades. A quality eyeshadow brush set makes a real difference in how your primer performs.
Blend with intention. Over-blending on oily lids breaks down the primer underneath. Blend until the edges are softened, then stop. You don’t need 45 seconds of windshield-wiper blending to get a smooth gradient.
Step 5: Lock It Down
After your eyeshadow look is complete, there are two finishing steps that extend wear on oily lids:
Spray setting spray on a brush. Instead of misting setting spray directly onto your face (which can disturb shadow), lightly mist a clean fluffy brush and press it gently over your finished eye look. This sets the shadow without moving it.
Use waterproof liner and mascara. Oil affects your liner and mascara too. If your lids are oily enough to crease your shadow, they’ll smudge your liner. Waterproof eyeliner formulas resist oil migration better than regular versions.
Common Mistakes That Ruin Oily Lid Prep
Moisturizing your lids right before makeup. Your lids produce enough oil naturally. Adding moisturizer directly on the eyelid skin before primer introduces extra slip. If your under-eye area needs moisture, apply eye cream below the orbital bone and keep it off the mobile lid.
Using cream eyeshadow alone. Cream eyeshadow can work on oily lids, but only when set with powder shadow on top. A cream formula by itself will slide and crease within hours on an oily lid because the skin oil softens the cream base.
Touching your eyes throughout the day. Every time you rub or touch your eyelids, you transfer oil from your fingers and disrupt the primer bond. If your eyes itch or feel tired, blot gently with a tissue instead of rubbing.
Skipping primer on the lower lash line. If you wear shadow or liner on your lower lash line, that area needs primer too. The skin under the eye is thinner and more prone to smudging from natural oils and moisture.
The Humidity Factor
Hot, humid conditions make oily lids worse because humidity increases sebum production and slows powder settling. If you live somewhere humid or you’re prepping for a summer event, increase your prep:
- Double-blot your lids before priming
- Use a waterproof primer formula
- Apply an extra-light layer of setting powder
- Keep blotting papers in your bag for midday touch-ups
- Consider a long-wear eyeshadow formula designed for extended wear
When to Reapply vs. Touch Up
If your shadow starts creasing by hour 6-8, you don’t necessarily need to redo the whole look. Here’s a quick fix:
- Press a blotting paper against the creased area to absorb the oil
- Using a clean finger or small brush, smooth out the crease line
- Lightly pat a thin layer of the original shadow color over the affected area
- Press (don’t sweep) to resettle the product
This takes about 30 seconds and can extend your wear another 3-4 hours. Keeping a single eyeshadow and a small brush in your bag makes touch-ups easy.
Building Your Oily Lid Kit
If you’re starting from scratch and need to build a kit specifically for oily-lid wear, here’s what to prioritize:
| Product | Why It Matters | Budget Pick | Splurge Pick |
|---|---|---|---|
| Mattifying primer | Creates the adhesion base | Milani Primer ($8) | Urban Decay Primer Potion ($28) |
| Translucent powder | Sets primer, absorbs oil | Coty Airspun ($8) | Laura Mercier ($43) |
| Dense shader brush | Packs color without disturbing base | Real Techniques ($7) | MAC 239 ($29) |
| Blotting papers | Pre-application prep and touch-ups | Clean & Clear ($4) | Tatcha ($12) |
| Setting spray | Final lock after application | NYX Matte Finish ($10) | Urban Decay All Nighter ($36) |
The budget column totals under $40 and will dramatically improve your eyeshadow wear if oily lids have been a problem. The best eyeshadow primers for oily lids article covers the primer options in more detail.
Sources
- Milady’s Standard Cosmetology (2024), Chapter 21: Makeup Application Techniques
- Urban Decay, Primer Potion formulation data, urbandecay.com (2025)
- Journal of Cosmetic Dermatology, “Sebum production and cosmetic wear time,” Vol. 23 (2024)
Related Guides
Get weekly eye care & beauty tips
Expert-researched guides delivered to your inbox. No spam, ever.
Frequently Asked Questions
Why does my eyeshadow crease even when I use primer?
The most common reason is applying too much primer. A thin, even layer works best. Excess primer creates a slippery surface instead of a grippy one. Blot your lids first with a tissue, apply primer sparingly, wait 60 seconds for it to set, then dust with translucent powder before applying shadow.
Should I use mattifying primer or regular primer for oily lids?
Mattifying primers work best for oily lids because they absorb excess oil rather than sitting on top of it. Regular primers improve adhesion but don't address the oil production that causes creasing. Look for formulas containing silica, kaolin, or dimethicone as key ingredients.
Can I skip primer and just use setting spray on my eyelids?
Setting spray alone won't prevent creasing on oily lids. It helps lock shadow in place after application, but it doesn't create the dry, adhesive base that stops oil from dissolving your eyeshadow. The best approach is using primer first, then finishing with setting spray for maximum wear time.
How long should I wait between primer and eyeshadow application?
Wait 60 to 90 seconds after applying primer before adding eyeshadow. The primer should feel slightly tacky but dry to the touch. If it still feels wet or slippery, your shadow will slide around and crease within hours.