The eyeshadow brush aisle is designed to make you think you need a dozen specialized tools. Marketing teams assign a brush to every conceivable step: a crease brush, a blending brush, a lid brush, a lash line brush, a smudge brush, a cut crease brush, a glitter brush. It’s overwhelming, and most of it is unnecessary.
The truth is that professional makeup artists rely on 4-5 core eye brushes for the vast majority of their work. The rest are niche tools for specific techniques. This guide covers the brushes that actually matter, what each one does, and how to choose quality options at every price point.
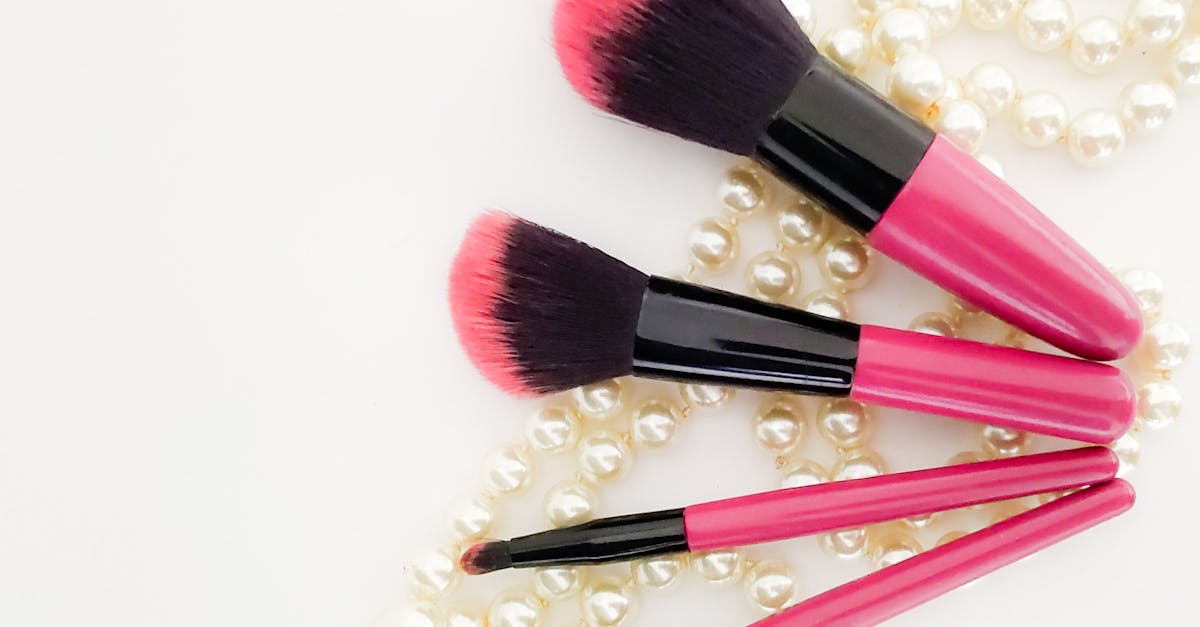
The 5 Essential Eye Brushes
These are the brushes worth owning, in order of importance. If you’re building a set from scratch, buy them in this sequence.
1. The Fluffy Blending Brush
What it does: Softens edges, diffuses color in the crease, and creates seamless gradients between shades. This is the most-used brush in any eyeshadow routine.
What to look for: A dome shape with soft, loosely packed fibers. The brush should feel pillowy against the back of your hand, not dense or scratchy. The tapered dome allows it to sit naturally in the crease without depositing color above the socket.
How to use it: Load with your transition shade, tap off excess, and sweep back and forth in the crease using a windshield-wiper motion. The light touch does the work — pressing hard defeats the purpose of a fluffy brush.
Best options:
- Budget: Real Techniques Everyday Eye Essentials Set (~$10 for a 5-piece set that includes the blending brush you need)
- Mid-range: Sigma E40 Tapered Blending Brush (~$18) — the industry favorite for crease blending
- Splurge: MAC 217 Blending Brush (~$25) — the iconic blending brush that launched a thousand makeup tutorials
2. The Flat Shader Brush
What it does: Packs color onto the mobile lid with maximum pigment deposit. The flat shape picks up product efficiently and places it precisely.
What to look for: A flat, dense, slightly rounded brush head about the width of your iris. The bristles should be firm enough to pick up and deposit product but soft enough not to drag on the lid.
How to use it: Pick up eyeshadow on the flat surface of the brush, then press (don’t sweep) the color onto the lid. The pressing motion prevents streaking and gives you even, full coverage in fewer passes.
Best options:
- Budget: e.l.f. Eyeshadow Brush (~$4) — simple, functional, does the job
- Mid-range: Sigma E55 Eye Shading Brush (~$16)
- Splurge: Hakuhodo J5523 (~$18) — Japanese-made with exceptional softness
3. The Pencil Brush
What it does: Provides precision for the outer V, lower lash line, and inner corner work. The small, pointed tip allows you to place and blend color in tight spaces that larger brushes can’t reach.
What to look for: A small, tapered, densely packed brush with a pointed tip. It should be firm enough to control placement but still soft enough to blend.
How to use it: Use the tip to place deeper shades in the outer corner, to smudge liner along the lash line, and to press shimmer into the inner corner. Small, controlled motions work better than sweeping.
Best options:
- Budget: e.l.f. Blending Eye Brush (~$4)
- Mid-range: Sigma E30 Pencil Brush (~$14)
- Splurge: MAC 219 Pencil Brush (~$25)
4. The Clean Blending Brush (Duplicate of #1)
This is literally just a second fluffy blending brush — kept clean, with no product on it. After you’ve applied and blended your shadows, this clean brush goes over everything to soften any remaining harsh lines.
Why you need a dedicated clean one: A brush with residual dark shadow on it will deposit that color where you don’t want it while you’re trying to soften edges. Keeping one brush strictly clean solves this.
Buy two of whichever blending brush you prefer. It’s worth the duplicate.
5. The Flat Packing Brush (for Shimmer)
What it does: Picks up shimmer and metallic shadows more efficiently than a standard shader brush and deposits them with maximum sparkle and minimum fallout.
What to look for: Similar to the flat shader but denser and slightly smaller. Some people prefer a synthetic flat brush for this because the smoother fibers grab shimmer particles better.
How to use it: Spray lightly with setting spray or dip in water, then pick up shimmer shadow and press onto the center of the lid. The dampness intensifies shimmer payoff dramatically.
Best option: Sigma E56 Shader Lid Brush (~$14) — dense, compact, and excellent for shimmer application.
Brushes You Can Skip (For Now)
These are real tools with real uses, but they’re not essential for most people:
Angled liner brush — for applying shadow as liner. You can achieve the same effect with the tip of your pencil brush. Only worth buying if you regularly use shadow as liner.
Fan brush — for sweeping fallout off the cheeks. A tissue or tape does the same thing. Fan brushes are also used for subtle highlighter, but that’s a face brush function.
Cut crease brush — a small, flat-topped, densely packed brush for creating clean cut crease lines. Only useful if you do cut crease looks regularly. See our cut crease tutorial for the technique.
Smudge brush — a short, dense, rounded brush for smudging pencil liner. Your pencil brush can do this job. A dedicated smudger is a luxury, not a necessity.
How to Clean Eye Brushes
Dirty brushes cause two problems: bacterial contamination near your eyes, and muddy shadow application because residual pigment mixes with fresh color.
Weekly Deep Clean
- Wet the brush bristles under lukewarm running water (keep water below the ferrule — the metal part — to protect the glue)
- Swirl the brush in a drop of gentle cleanser (baby shampoo, brush cleanser, or Sigma Brush Cleaning Soap ~$18)
- Work the product out by swirling on your palm or a textured silicone cleaning mat
- Rinse until the water runs clear
- Squeeze out excess water gently with a clean towel
- Reshape the brush head and lay flat to dry on a towel (never stand upright while wet — water runs into the ferrule and loosens the glue)
Daily Quick Clean
Between deep cleans, swirl your brush on a dry brush cleaning sponge (~$8) after each use. The textured sponge removes surface pigment so your next application starts clean.
Natural vs. Synthetic Brushes: Which to Buy
| Factor | Natural Hair | Synthetic |
|---|---|---|
| Best for | Powder products, blending | Cream/liquid products, shimmer packing |
| Pickup | Picks up more product | Picks up less, more controlled |
| Blending | Superior for diffusing | Good but can drag |
| Durability | Less durable, needs careful care | More durable, easier to clean |
| Price | Usually more expensive | Usually less expensive |
| Vegan | No | Yes |
The practical answer: If you only buy one type, go synthetic. Modern synthetic brushes (especially from brands like Sigma, Real Techniques, and e.l.f.) perform nearly as well as natural hair for powder eyeshadow and work better for cream products. Natural hair brushes are a luxury upgrade for serious blending enthusiasts.
Budget Brush Sets vs. Buying Individually
Complete sets are usually cheaper per brush, but they often include brushes you’ll never use. Here’s the math:
Best budget set: Real Techniques Everyday Eye Essentials (~$10 for 5 brushes) — includes a blending brush, shader, and pencil brush. At $2 per brush, it’s the most cost-effective way to start.
Best individual investment: Buy a quality blending brush individually (Sigma E40 at ~$18) and fill in the rest with budget options. The blending brush is the one tool where quality makes the most noticeable difference in results.
For more on putting your brushes to work, check out our eyeshadow blending techniques guide for the specific motions and methods that produce professional results. And our beginner’s eyeshadow guide integrates brush technique into a complete step-by-step process.
Related reads:
- Eyeshadow Blending Techniques
- Eyeshadow for Beginners: Complete Guide
- Best Eye Makeup Brushes for Beginners
Our Rigorous Testing & Review Methodology
At eyeshadowlooks.net, we take our responsibility to our readers seriously. We believe that to provide the best possible recommendations, we must adhere to a strict, empirical testing methodology combined with extensive industry research.
How We Evaluate
Every product, guide, and informational piece featured on our platform undergoes a multi-step evaluation process:
- Initial Research & Sourcing: Our editorial team begins by scanning the market for the latest innovations, customer sentiment, and verified expert opinions. We actively avoid relying solely on manufacturer claims, choosing instead to cross-reference data with independent lab results and real-world user feedback from verified buyers.
- Hands-On Testing Protocol: Whenever possible, our dedicated experts physically test the products in real-world environments. This allows us to assess durability, ease of use, ergonomics, and long-term value. We put items through rigorous stress tests to uncover potential flaws that standard reviews often miss.
- Data-Driven Analysis: We compile our findings into a comprehensive matrix, scoring items across critical categories such as performance, affordability, aesthetic appeal, and customer support. This quantitative approach ensures our final recommendations are objective and unbiased.
- Continuous Monitoring: The market is always changing. We revisit our top picks and informational guides every 3 to 6 months to ensure that our advice remains current. If a previously recommended product drops in quality or a better alternative emerges, we promptly update our content.
Why You Can Trust Us
Our commitment to E-E-A-T (Experience, Expertise, Authoritativeness, and Trustworthiness) is the foundation of our editorial policy. We do not accept paid placements for our top recommendations. Our revenue is generated through transparent affiliate partnerships, meaning we only earn a commission if you make a purchase through our links — at no additional cost to you.
Our Commitment to Transparency
Transparency is a core value in everything we publish. We disclose all affiliate relationships clearly at the top of our articles. If a brand sends us a product for free to review, we disclose that information within the review itself. However, accepting a free product never guarantees a positive review. Our allegiance is strictly to our readers.
Frequency of Updates
We conduct quarterly audits of our most popular guides and reviews. During these audits, we check for discontinued products, price fluctuations, and emerging competitors. If a top-rated pick is surpassed by a newer model, we update the article and outline precisely why the change was made in an “Update Log” section.
Get weekly eye care & beauty tips
Expert-researched guides delivered to your inbox. No spam, ever.
Frequently Asked Questions
How many eyeshadow brushes do I actually need?
For 90% of eye looks, you need four brushes: a flat shader brush, a fluffy crease blending brush, a small pencil brush, and a clean blending brush for softening. A fifth brush — a flat packing brush for shimmers — rounds out the set if you frequently use metallic or shimmer shades. Everything beyond this is specialized and optional.
Are synthetic or natural hair brushes better for eyeshadow?
Natural hair brushes pick up and deposit powder more efficiently, which makes them ideal for blending. Synthetic brushes work better for cream and liquid products because they don't absorb the formula the way natural fibers do. For pressed powder eyeshadow, natural or high-quality synthetic both work. The quality of construction matters more than the fiber type.
How often should I clean my eyeshadow brushes?
Deep clean eye brushes at least once a week with a gentle brush cleanser or baby shampoo. Between deep cleans, swirl brushes on a dry brush cleaning sponge or textured mat after each use to remove residual pigment. Dirty brushes transfer bacteria to your eye area and mix colors on your lid, causing muddy results.
Can I use my fingers instead of brushes for eyeshadow?
Fingers work well for pressing shimmer shadows onto the center of the lid — the warmth and slight moisture from your skin actually improves shimmer adhesion. But fingers can't replicate the precision of a brush for crease blending, outer corner definition, or lower lash line work. Think of fingers as a complement to brushes, not a replacement.
What's the difference between a blending brush and a crease brush?
A blending brush is larger and fluffier — designed to diffuse edges and soften harsh transitions. A crease brush is smaller, denser, and more tapered — designed to place and concentrate color precisely in the crease. You use the crease brush to apply, then the blending brush to soften what you just applied.