The smokey eye has an intimidating reputation, but it is actually one of the most forgiving techniques in eye makeup. Unlike a cut crease or a graphic liner, the smokey eye thrives on imprecision. Blurry edges, soft gradients, and a little controlled messiness are the entire point.
The trick for beginners is starting with colors that leave room for error. Black is the classic choice, but brown is far easier to learn with. You can always graduate to darker, bolder colors once you have the blending technique down.
What You Need
You do not need a giant brush collection or a 40-shade palette. Here is the minimum kit:
- A matte transition shade (warm taupe or light brown)
- A matte crease shade (medium to dark brown)
- A shimmer or satin lid shade (champagne, bronze, or rose gold)
- A dark matte shade (espresso, charcoal, or black)
- A kohl or pencil eyeliner in black or dark brown
- A fluffy blending brush
- A flat shader brush
- A small smudge brush
- Eyeshadow primer or concealer
- Mascara
If you are working from an existing palette, just pick four shades ranging from light to dark. Most palettes include these automatically.
Step 1: Prime Your Lids
Apply a thin layer of eyeshadow primer from lash line to brow bone. Spread it evenly with your fingertip, then set it with a light dusting of translucent powder or your transition shade.
Primer is not optional for a smokey eye. The layering and blending involved will cause unprimed shadows to crease, fade, and muddy together within a couple of hours.
Step 2: Set the Transition
Dip your fluffy blending brush into the lightest matte shade (warm taupe) and sweep it across the crease and slightly above it. Use windshield-wiper motions, moving the brush back and forth through the crease.
This shade creates a buffer zone between the darker colors you will apply next and your bare skin. Without it, the edges of your smokey eye will look harsh and patchy instead of diffused.
Extend the color slightly above your natural crease. The transition shade should be visible when your eyes are open, creating a soft halo of warm color around the deeper shades to come.
Step 3: Build the Crease
Switch to a smaller, slightly denser brush and pick up the medium-brown matte shade. Apply it directly into your crease with the same windshield-wiper motion, concentrating the pigment more than you did with the transition shade.
Focus the color along the orbital bone, where you can feel a slight indent when you press gently with your finger. Blend toward the outer corner, angling the color slightly upward toward the tail of your eyebrow. This upward angle keeps the eye looking lifted rather than droopy.
Do not worry about perfection at this stage. The whole point of a smokey eye is gradual layering. You can always add more depth but removing excess product is harder.
Step 4: Apply the Lid Color
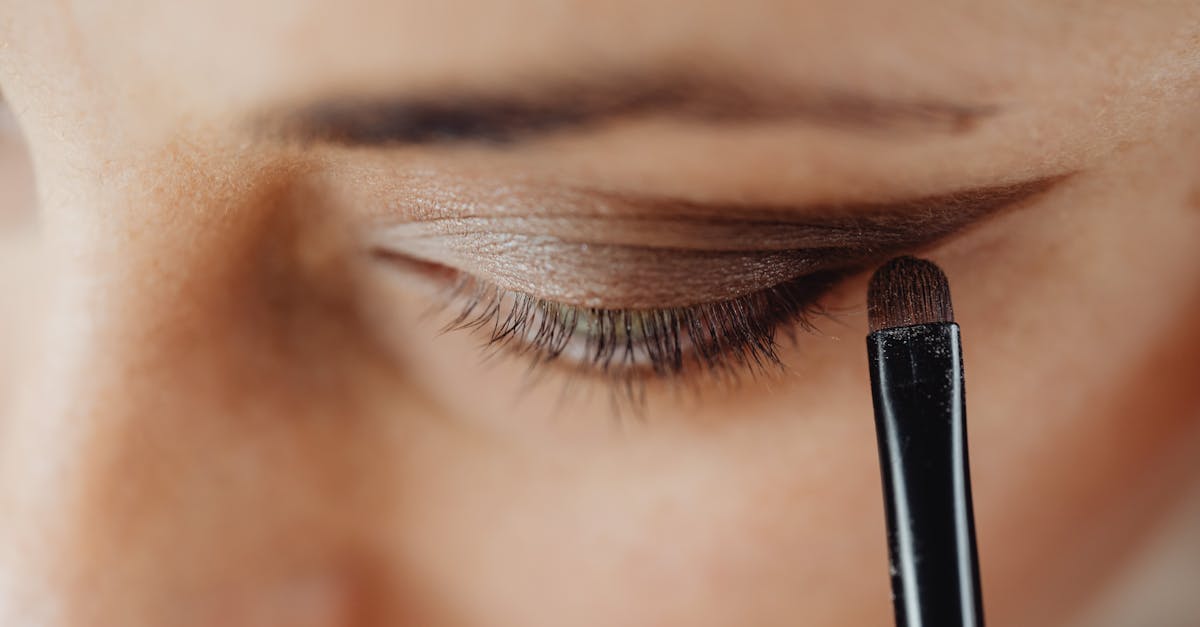
Use a flat shader brush or your fingertip to pat the shimmer shade across your mobile lid, from lash line to crease. Patting deposits more pigment than sweeping, and it prevents the shimmer from scattering into the crease work you just built.
A satin or metallic shade on the lid provides dimension and catches light, which makes the deeper surrounding shades look even smokier by contrast. Champagne and bronze work with almost every skin tone and pair naturally with brown-toned crease shades.
Step 5: Darken the Outer Corner
Take a small, dense brush and pick up the darkest shade in your selection. Press it into the outer corner of your eye, right where your upper and lower lash lines would meet if extended. Blend it inward along the crease and slightly upward.
This is the step that defines the “smokey” shape. The deepest color sits in the outer V and diffuses toward the center and upward. Keep the darkest pigment concentrated in a small area. You can always blend it out, but concentrating it first gives you control.
If you are using black, load your brush lightly. A tiny amount of black goes a long way, and over-applying it is the number one beginner mistake. With brown, you have more margin for error because it blends and diffuses more naturally.
Step 6: Line and Smudge
Run your kohl or pencil liner along the upper lash line. You do not need a perfectly straight line here because you are going to smudge it. Use a small smudge brush or a cotton swab to push the liner upward into the eyeshadow, blurring the boundary between liner and shadow.
Repeat along the lower lash line, applying the pencil to the outer two-thirds. Smudge it downward slightly. This connects the top and bottom of the eye and creates that wraparound smokiness.
If you want a softer look, skip the pencil liner entirely and just press the dark eyeshadow shade along both lash lines with a thin, dense brush. This creates definition without the intensity of liner.
Step 7: Highlight and Clean Up
Apply a light shimmer shade to two spots: the inner corner of the eye and just below the brow bone arch. The inner corner highlight opens up the eye and prevents the look from feeling too closed-in and heavy. The brow bone highlight lifts the whole shape.
Check beneath your eyes for any shadow fallout. Use a clean brush or a damp cotton swab dipped in micellar water to sweep away any stray pigment. If you applied concealer or foundation before your eye makeup, touch it up now.
Step 8: Curl and Mascara
Curl your lashes with an eyelash curler, then apply two coats of mascara to both upper and lower lashes. The smokey eye demands visible lashes because they frame the whole production. If your lashes are sparse, this is a good look for false lash strips or individual clusters at the outer corners.
Common Beginner Mistakes
Applying too much dark shadow at once is the biggest pitfall. Build intensity gradually across three or four layers rather than loading up on one heavy application.
Over-blending is another common issue. A sweet spot exists between harsh lines and a muddy mess. Blend enough to soften edges, then stop. If the colors start to merge into a single flat tone, you have gone too far. A good smokey eye should still have visible variation between the lid, crease, and outer corner.
Ignoring the lower lash line leaves the look unfinished. The bottom half of the eye needs some definition, even if it is just a light smudge of shadow or liner along the outer half.
Using only matte shades creates a flat, heavy look. That shimmer on the lid is not optional. It provides depth and dimension and keeps the dark shades from overwhelming the eye.
Adapting for Different Eye Shapes
For hooded eyes, apply the crease shade above the natural fold so it remains visible when your eyes are open. Check your placement with eyes open throughout the process.
For monolid eyes, concentrate the darker colors along the lash line and blend upward gradually. Skip the crease definition step since there is no defined crease to follow, and instead create a gradient from dark at the lash line to light above.
For deep-set eyes, go lighter on the crease shading and focus the darker shades primarily on the outer corner and lash line. Too much depth in the crease can make deep-set eyes look recessed.
For round eyes, extend the darker shades slightly beyond the outer corner of the eye to elongate the shape. Angle the outer V toward the temple.
Frequently Asked Questions
Can I do a smokey eye with drugstore products?
Absolutely. The technique matters far more than the brand. Affordable palettes with a mix of matte and shimmer finishes, a basic set of eye brushes, and a drugstore pencil liner are all you need.
How do I stop my smokey eye from looking muddy?
Use fewer products, build layers slowly, and make sure each shade occupies its own zone. The transition shade should be visibly lighter than the crease shade, which should be visibly lighter than the outer corner shade. Clean your brush between colors or use a different brush for each shade to keep them distinct.
Is a smokey eye appropriate for daytime?
A soft brown smokey eye works perfectly for daytime when you keep the colors warm and the intensity moderate. Reserve the deepest blacks and heavy liner for evening looks.
Sources
- L’Oreal Paris USA. (2025). “How to Create a Smokey Eye Look.” lorealparisusa.com.
- Bobbi Brown Cosmetics. (2025). “Smokey Eye Tutorial.” bobbibrown.com.
- Harper’s Bazaar. (2025). “The Best Smokey Eye Tutorials for Every Skill Level.” harpersbazaar.com.
Related Guides
- Cut Crease Tutorial: The Technique That Makes Any Eye Shape Pop
- Night Out Eye Makeup: Dramatic Looks That Last All Evening
- Eyeshadow Placement Guide: Where Every Shade Goes and Why
- Wedding Eye Makeup: Complete Guide
- Best Eye Makeup Brushes for Beginners
- How to Stop Eyeshadow from Creasing
- Eyeshadow & Eyeliner Color Combinations
Get weekly eye care & beauty tips
Expert-researched guides delivered to your inbox. No spam, ever.