Standard eyeshadow blending tutorials assume your crease is visible when your eyes are open. If you have hooded eyes, that assumption doesn’t apply — your fold of skin covers your crease, and traditional blending advice produces a look that vanishes the moment you stop looking down.
Blending on hooded eyes isn’t harder. It’s different. The motions change, the placement shifts upward, and the tools that work best are smaller and firmer than what most tutorials recommend. Once you understand these adjustments, blending becomes just as straightforward as it is for any other eye shape.
Understanding What “Hooded” Actually Means for Blending
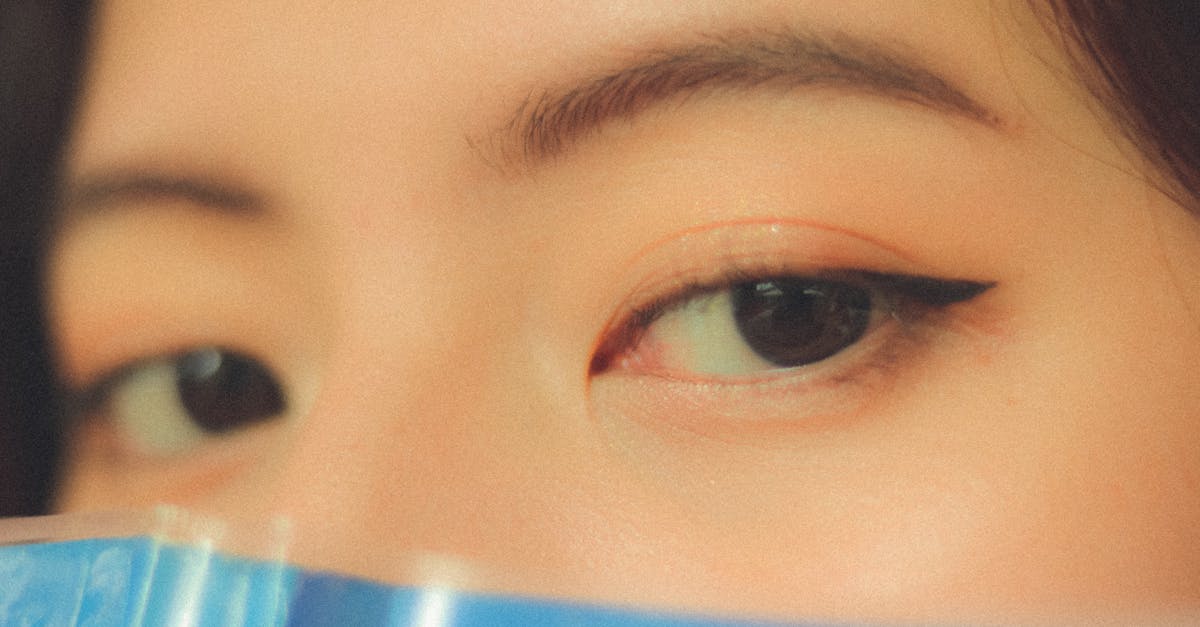
A hooded eye has excess skin that folds over the crease, partially or fully covering the mobile lid when the eye is open. This creates two practical problems for blending:
- The crease is hidden. Color placed in your natural crease disappears under the fold.
- Skin touches skin. Your hood rests against your lid, which transfers and smudges wet or freshly applied shadow.
The solution to both problems is the same: work higher. Your “functional crease” — the line where color needs to sit to be visible — is above your natural crease, on the visible portion of your brow bone area.
Step 1: Set Your Primer and Let It Dry Completely
This step matters more for hooded eyes than any other eye shape. The skin-on-skin contact in your fold creates warmth and friction that breaks down shadow faster. Apply a dedicated eyeshadow primer (Urban Decay Primer Potion or Milani Eyeshadow Primer are both reliable) to your entire lid up to the brow bone.
Critical detail: Wait a full 60 seconds before applying any shadow. Touch your lid — it should feel dry and slightly tacky, not slippery. If it’s still moist, your shadow will slide into the crease within an hour.
Set the primer with a light dusting of translucent powder using a flat shader brush. This creates a dry, grippy canvas that holds powder shadow in place through the skin-to-skin contact.
Step 2: Find Your Functional Crease With Eyes Open
Open your eyes and look straight ahead into a mirror. Take a fluffy brush and press it gently against your lid — find the point where the brush tip sits just above the edge of your visible hood. This is your functional crease line.
With your eye still open, use a small tapered blending brush to apply a medium transition shade (a warm brown, soft mauve, or taupe that’s 2-3 shades deeper than your skin) along this functional crease line. Use a windshield-wiper motion — back and forth — across the upper portion of your visible lid space.
Why this works: By applying color with your eyes open, you see exactly where the shade will sit in real life. The transition shade will look awkwardly high when you close your eye to check, but that’s correct — the hood will push it down into the right visual position when your eyes are open.
Step 3: The “Hooded Eye Blend” — Small, Controlled Motions
Standard blending advice says to use big, sweeping circular motions with a large fluffy brush. On hooded eyes, this pushes color too far in every direction, covering the limited visible space with a muddy wash.
Instead, use what I call the press-and-flick technique:
- Press the brush into the color at the functional crease line with light pressure
- Flick upward and outward in short strokes (about 1 cm each)
- Rotate the brush slightly between flicks to use a clean section of bristles
Each flick should go upward toward the brow bone, never downward toward the lash line. Downward blending pushes color into the fold where it disappears.
The Right Brush for This
Use a smaller, slightly firmer blending brush — not the big fluffy ones marketed as “blending brushes.” Ideal options include:
- Sigma E35 Tapered Blending — small enough for precision, flexible enough for softening
- Real Techniques Setting Brush — technically a face brush, but the small, dense head works perfectly for controlled lid blending
- MAC 217 — the classic choice, small and tapered with natural hair that picks up and deposits powder gradually
Step 4: Build Depth in the Outer Corner Without Losing Definition
On hooded eyes, the outer corner is one of the few areas that remains visible regardless of how pronounced your hood is. This makes it the most important area for adding depth and dimension.
Apply a deeper shade — a dark brown, plum, or charcoal — to the outer V of your eye using a small pencil brush. The pencil brush gives you the precision to keep the color concentrated rather than spread across your limited lid real estate.
Blend this deeper shade using only upward strokes. Connect it to your transition shade above by flicking upward from the outer corner into the crease area. Stop blending before the color reaches the inner half of your eye — keeping depth concentrated on the outer third creates a lifted, elongated effect that counteracts the “heaviness” hooded eyes can create.
Step 5: Pack Shimmer on the Center Lid (Don’t Blend It)
Here’s a rule specific to hooded eyes: do not blend your lid shade. On the mobile lid — the small strip of skin visible between your lash line and your fold — press a shimmer or satin shade using a flat shader brush or your fingertip. Pat it on firmly and leave it alone.
Why no blending? The lid space on hooded eyes is small. Blending a lid shade spreads it beyond the visible area, diluting the impact. A firmly packed shimmer reflects light from the small visible strip, making the lid area appear larger and more defined.
Use your finger for metallic and foiled shimmers — the warmth of your skin melts the product slightly and helps it adhere in a single layer rather than flaking off into the fold.
Step 6: Connect the Lash Line to Prevent the “Floating Shadow” Effect
On hooded eyes, the gap between the lash line and the visible shadow placement above the hood can look disconnected — like the shadow is floating above the eye rather than framing it. Fix this by:
- Using a flat definer brush to press a medium-dark shade along the upper lash line
- Smudging it slightly upward with a pencil brush using tiny circular motions
- Connecting the lash line color to the outer corner depth you built in Step 4
This grounds the eye look and creates visual cohesion between the lower lash line area and the shadow placement above.
Common Blending Mistakes on Hooded Eyes
Blending too far inward
Color concentrated on the outer two-thirds of the lid lifts and opens the eye. Color that extends fully to the inner corner can make hooded eyes look smaller and heavier. Keep the inner corner clean with just a light highlight shade.
Using too much product on the first pass
Hooded eyes have less surface area to work with. A heavy first application leaves nowhere to blend into. Start with barely any product on your brush — tap off excess — and build intensity over 3-4 passes. You’re essentially micro-dosing shadow and blending between each addition.
Blending downward
Every blending motion should travel upward and outward. Downward blending pushes color into the fold where the hood hides it, and deposits excess product at the fold line where it will crease.
Skipping primer
On non-hooded eyes, skipping primer might cost you 2-3 hours of wear time. On hooded eyes, where skin constantly touches skin, skipping primer can cause visible creasing within 30 minutes.
The Two-Mirror Check
The final and most important habit for blending on hooded eyes: check your work with your eyes open, looking straight ahead, in a mirror at face height. Many people apply makeup looking down into a mirror on a desk or counter. This lifts the hood and shows you a view of your lids that nobody else actually sees.
After completing each step, lean back from the mirror and look straight ahead with a relaxed expression. This shows you the “real” version — what other people see — and lets you adjust placement before moving to the next step. This single habit will improve your hooded eye shadow results more than any product or brush upgrade.
Get weekly eye care & beauty tips
Expert-researched guides delivered to your inbox. No spam, ever.
Frequently Asked Questions
Why does my eyeshadow disappear when I open my eyes if I have hooded lids?
Your hood — the fold of skin above your crease — covers whatever you've placed below it when your eyes are open. The fix is placing your transition and crease colors higher than your natural crease, into the visible space above the fold. Check placement with your eyes open and looking straight ahead, not looking down into a mirror. If the color disappears when you open your eyes, it's too low.
What brush is best for blending on hooded eyes?
A smaller, firmer blending brush like the Sigma E35 or a tapered crease brush gives you more control than a large, fluffy brush. Hooded eyes have less visible lid space, so a large brush deposits color over too wide an area and pushes pigment into the fold. A smaller brush lets you place color precisely and blend in controlled motions within the smaller working area.
Should I blend with my eyes open or closed for hooded eyes?
Both, at different stages. Apply your base shade and initial crease color with your eyes open — this lets you see where the color actually sits when your hood is in its natural position. Then close your eye to blend out hard edges and smooth transitions. Alternate between open and closed to check placement against the finished visible result.
Can hooded eyes do a cut crease?
Yes, but placement must be adjusted. Apply the concealer cut line with your eyes open so it sits above your natural fold rather than inside it. When you close your eye, the line will look unnaturally high, but when you open your eye, the hood will push it into the correct visible position. Use a small flat brush for precision and expect it to take a few attempts to find your ideal placement.
Why does my eyeshadow crease only on hooded eyes?
The skin fold of hooded eyes creates constant friction between two layers of lid skin when you blink. This friction pushes shadow into the fold line. Use an eyeshadow primer (applied 60 seconds before shadow), set it with a translucent powder, and use long-wearing pressed powder formulas rather than creams. These three steps together dramatically reduce creasing on hooded lids.