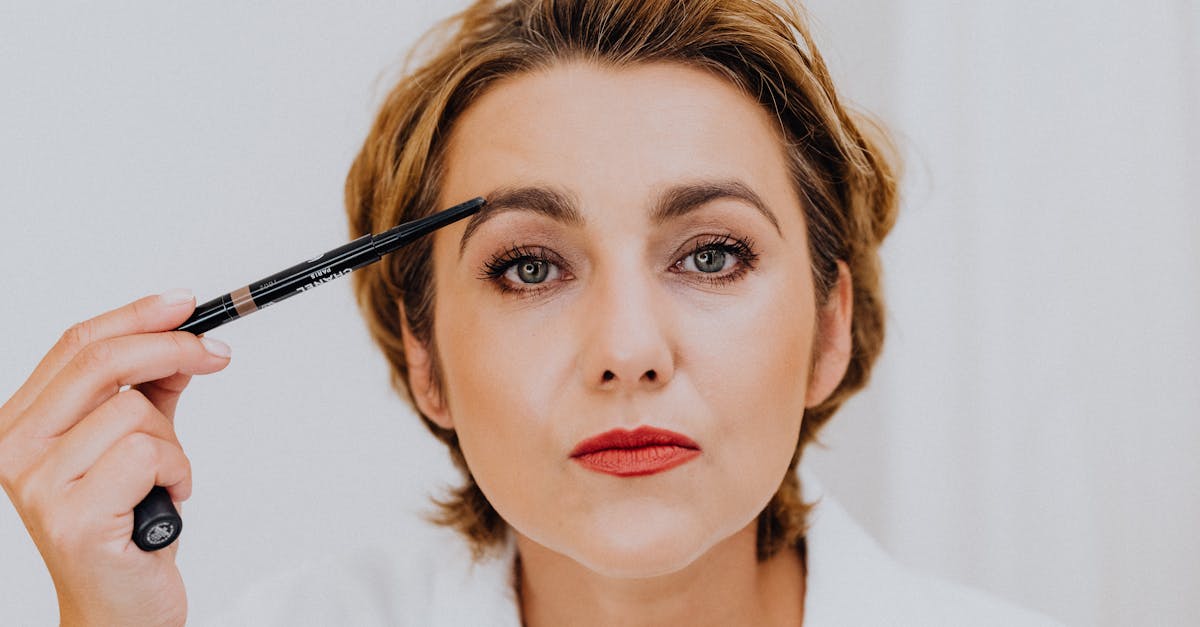
The line between a well-executed eyebrow pencil and one that looks drawn-on is narrow, mostly a matter of color choice, pressure, and one 10-second finishing step. Here’s the complete technique.
Choosing Your Pencil
Shade Selection
This is where most eyebrow mistakes start.
General rule: Go one to two shades lighter than the darkest hair in your brow. Brow hair contains multiple tones, lighter when it first grows in, darker at the base. Matching the lightest-mid tone looks most natural; matching the darkest tone looks applied.
By hair color:
- Blonde/light brown hair: Use a cool taupe or light brown (ASH blonde pencils tend to look best)
- Medium brown hair: Use a medium-warm brown or cool brunette
- Dark brown hair: Use medium brown or dark brown, avoid black
- Black hair: Medium dark brown rather than black; black pencil can look extremely harsh
- Gray/silver hair: Use a light taupe or soft blond, gray pencils are often too blue
Formula and Tip
Micro-tip pencils (very fine, almost mechanical) are best for the hair-stroke technique and true beginner precision.
Standard wax pencils work well but require more frequent sharpening for fine strokes. Keep them cold for a harder, sharper tip.
Products worth considering:
- Anastasia Beverly Hills Brow Wiz (~$23): Ultra-fine micro-tip, long-wearing, wide shade range
- L’Oréal Paris Brow Stylist Definer (~$10): Drugstore equivalent to the ABH tip quality; excellent value
- Benefit Cosmetics Precisely My Brow Pencil (~$26): Fine tip with good color range
- e.l.f. Cosmetics Brow Lift Stick (~$7): Budget option that performs above its price point
Brow Mapping: Where Your Brow Should Start, Peak, and End
Before filling, establishing the three key reference points:
-
Head (inner edge): Hold a pencil vertically next to the nostril, where it intersects the brow bone is where the brow should start. Brows that start too far in (toward the nose) can look close-set.
-
Arch: Hold the pencil from the nostril through the center of the pupil to the brow, where it intersects is the approximate arch position (highest point). This shifts slightly based on your preferred shape.
-
Tail (outer edge): Hold the pencil from the nostril through the outer corner of the eye, where it intersects the brow bone is where the brow should end. Brows that end before this look short; brows that end past this can look droopy.
These are guidelines, not rules, your existing brow shape often suggests the best natural variation.
Step-by-Step: Hair-Stroke Brow Technique
Step 1: Brush Through First
Start with a clean spoolie brush, brush the brow hairs upward and slightly outward (the direction hair naturally grows). This shows you what hair you have to work with and reveals sparse areas that need filling.
Step 2: Define the Bottom Edge (Optional)
For a more defined look, draw a thin guideline along the bottom edge of the brow with very light pressure, this gives you a lower boundary to fill to. Don’t make this line dark or obvious; it’s just a guide.
Step 3: Fill Sparse Areas First
Start with the sparse or patchy areas of the brow rather than the densest part. Place individual strokes in the direction of hair growth:
- In the head of the brow: strokes go slightly upward
- In the arch: strokes go diagonally upward toward the arch
- In the tail: strokes go downward and outward
Use very light pressure, you can always add more.
Step 4: Connect and Define the Body
Work through the main body of the brow with the same hair-stroke motion. The strokes should layer with existing hair to look like natural brow hairs, not block-fill the entire area.
Step 5: Softest Hand on the Inner Third
The inner section (head) of the brow should be the softest, most blended part. Harsh inner brows look particularly unnatural. Use barely-there pressure here, or skip it entirely for a more natural gradient effect where the outer brow is more defined.
Step 6: Spoolie Through (Most Important Step)
Take your spoolie and brush through the brow one final time in the direction of growth. This:
- Blends pencil strokes into natural hair
- Breaks up any over-concentration of product
- Blends the overall brow for a natural finish
This one step is the difference between “good brow day” and “drawn-on brow.”
Common Mistakes
Filling too dark: Go lighter than you think you need.
Drawing a solid line instead of strokes: Block-filling makes brows look like a painted stripe. Hair-strokes always look more natural.
Ignoring the spoolie: The post-fill spoolie pass is not optional if you want a natural result.
Making brows perfectly symmetrical: Your face is naturally asymmetrical. Identical brows (same angle, same thickness) often look more artificial than brows that naturally differ slightly. “Sisters, not twins” is the professional maxim.
Harsh inner edge: The inner third of the brow should be soft and diffused, not sharply defined.
Setting Your Brows
For all-day hold, apply a clear or tinted brow gel over your filled brows. This:
- Keeps hairs in place
- Sets the pencil product
- Adds definition without adding more color
Options: Anastasia Beverly Hills Clear Brow Gel ($24), Boy Brow by Glossier ($18 in tinted or clear), e.l.f. Clear Brow & Lash Mascara (~$3).
Related Guides
- Eyebrow Shaping Guide: How to Find Your Best Brow Shape
- How to Apply Eyeshadow for Beginners
- Makeup for Close-Set Eyes
Tinting vs. Drawing: When to Use Each Approach
Drawing approach (pencil/powder): Best for adding definition, creating shape, and filling sparse areas. Most flexible for day-to-day adjustments.
Brow tinting (temporary dye): Colors both the skin and any existing brow hairs for 2-4 weeks. Eliminates the need for daily filling and looks natural even if brow product wears away. Available at salons or as at-home kits. Works best when you have existing brow hairs to stain.
Microblading/nano brows: Semi-permanent pigment application using a nano needle (for nano brows) or a manual hand-held tool blade (for microblading). Lasts 1-3 years with touch-ups. Most effective for people with sparse brows who want a no-maintenance result.
Sources
- American Academy of Dermatology, Eyebrow trends and care
- Anastasia Beverly Hills Brow Academy, Brow mapping and product application guides
- Brow Goals, Stephanie C. (Harper Collins, 2020)
Get weekly eye care & beauty tips
Expert-researched guides delivered to your inbox. No spam, ever.
Frequently Asked Questions
How do I choose the right eyebrow pencil shade?
For most people, go one to two shades lighter than the darkest part of your brow hair. The exception: if you have very light blonde brows or want very defined brows, matching your natural color works. Going too dark is the most common mistake, it creates an obviously drawn-on look. For gray or white brow hair, choose a light taupe rather than a dark pencil.
What is the hair-stroke technique for eyebrow pencil?
The hair-stroke technique means drawing individual short strokes in the direction of hair growth rather than filling the brow as a single block of color. Each stroke mimics the appearance of a single brow hair. The result looks significantly more natural than shading the brow solid. Use very light pressure, especially at the head of the brow (inner edge) where hair is sparse.
How do I stop my eyebrow pencil from looking too harsh?
Three adjustments: (1) use a lighter shade, (2) brush through the brow with a spoolie immediately after applying to break up the strokes and blend them with natural hair, and (3) apply with very light pressure at the inner third of the brow where less pigment is needed. Spoolying through after application is the single biggest improvement most people can make.