The sunset eyeshadow look is one of those rare eye looks that’s both visually striking and practically achievable. It mimics the warm color gradient of a sunset — gold fading into orange fading into red fading into deep burgundy — across your lid and crease. The result is a warm, glowing eye that reads as intentionally artistic without requiring advanced techniques.
What makes sunset eyes work is the gradient. Every color flows seamlessly into the next, creating the illusion of a continuous spectrum rather than distinct stripes of color. Getting that gradient right comes down to shade order, blending direction, and knowing when to stop.
What You’ll Need
Eyeshadow Shades (4-5 shades minimum)
- Warm yellow (matte) — the lightest shade, goes highest
- Warm orange (matte) — the mid-tone, goes in the crease
- Warm red or cranberry (matte) — the deep mid-tone, outer crease
- Deep burgundy or dark warm brown (matte) — the darkest, outer V
- Gold shimmer (metallic or shimmer) — center lid accent
Tools
- Fluffy blending brush (for transition)
- Medium crease brush (for orange and red placement)
- Pencil brush (for outer V precision)
- Flat shader brush or fingertip (for gold shimmer)
- Eyeshadow primer
A Note on Shade Selection
Every shade in a sunset look must be warm-toned. This is where the look fails most often. A cool-toned red (like a pink-red) or a cool yellow (lemon yellow) breaks the warm gradient and looks jarring. Stick to shades that lean toward orange and gold rather than pink and lemon.
Step 1: Prime and Set the Base
Apply eyeshadow primer to the entire lid from lash line to brow bone. Let it dry for 60 seconds.
Set the primer with a light wash of the warm yellow shade, sweeping it across the entire area from lash line to brow bone. This serves two purposes: it sets the primer for better shadow adhesion, and it creates the “sky” of your sunset — the lightest area that the deeper colors will fade into.
Pro tip: Apply the yellow generously. It should be visible as a warm wash of color, not just a barely-there base. This yellow glow is what gives the finished look its luminous, sun-lit quality.
Step 2: Orange in the Crease — The Heart of the Gradient
The warm orange shade goes in the crease and slightly above it. This is the color that connects the light yellow upper area to the deeper shades below.
Using a fluffy blending brush, load a moderate amount of orange and place it directly in your crease. Sweep back and forth in windshield-wiper motions, then blend upward into the yellow base. The goal is a seamless fade from orange into yellow — no visible line where one color ends and the other begins.
Blending direction matters: Always blend upward from orange into yellow, not downward. Downward blending pushes orange onto the mobile lid, where you want the gold shimmer to go later. Upward blending creates the sky-like gradient you’re after.
Extend the orange slightly beyond the outer corner of your eye, angling it upward toward the tail of your eyebrow. This creates the elongated, warm glow that defines the sunset shape.
Step 3: Red in the Outer Crease — Adding Drama
The warm red or cranberry shade creates the dramatic depth that transitions from the orange “sky” to the dark “horizon line.”
Using a medium crease brush or a slightly smaller, firmer blending brush, apply the red in the outer half of the crease. Concentrate it where the orange is deepest — at the outer corner — and blend it inward, fading it before it reaches the center of the eye.
How to work with red eyeshadow:
Red pigments can be tricky. Here’s how to handle them:
- Pat first, blend second. Place the red by pressing the brush into the crease with a patting motion to deposit color. Then, with a clean brush, blend the edges where the red meets the orange using small circular motions.
- Build gradually. Apply three thin layers rather than one thick one. Red looks more vibrant when built up than when applied heavily in one pass.
- Use a sticky base underneath. If your red seems patchy, apply a thin layer of concealer or eye primer specifically in the outer crease area before the red. The extra tackiness helps the pigment adhere evenly.
After blending, the outer crease should show a clear gradient: yellow → orange → red, with each shade flowing into the next.
Step 4: Burgundy in the Outer V — The Horizon Line
The deepest shade represents the lowest, most intense part of the sunset. Apply a deep burgundy or dark warm brown to the outer V — the triangular area where the upper and lower lash lines would meet if extended.
Use a pencil brush for precision. Press the dark shade into the outer corner and blend it:
- Upward into the red in the crease
- Inward along the upper lash line (about one-third of the way)
- Downward along the outer portion of the lower lash line
The burgundy should be the most concentrated, most defined shade in the look. It anchors the gradient and provides the contrast that makes the lighter shades glow.
Step 5: Gold Shimmer on the Center Lid — The Sun
This is the moment the look comes together. The gold shimmer on the center of the lid represents the sun in your sunset — a bright, reflective focal point surrounded by warm gradients.
Using a flat shader brush or your fingertip, pat gold shimmer onto the center of the mobile lid. Press firmly, don’t swipe. The shimmer should be opaque and reflective, catching light and drawing attention to the center of the eye.
Extend the gold slightly toward the inner corner, fading it into a more subtle glow. Don’t extend it into the outer corner — that’s where the dark, matte depth lives, and mixing shimmer into it will muddy the contrast.
Best gold shades for sunset looks:
- Metallic foiled gold — Most impact. Liquid-metal finish that photographs beautifully.
- Warm champagne gold — Softer, more everyday. Works for sunset looks you want to wear to work.
- Coppery gold — Adds an extra warm dimension that blends into the orange crease organically.
Step 6: Lower Lash Line and Finishing Details
Complete the sunset by bringing the gradient down to the lower lash line:
- Outer third: Smudge the burgundy along the outer lower lash line using a small pencil brush
- Middle third: Apply a thin line of the orange shade
- Inner third: Press a tiny amount of gold shimmer into the inner corner
This mirrors the gradient on the upper eye and creates a cohesive frame around the entire eye.
Inner Corner Highlight
A pop of gold or champagne shimmer in the inner corner brightens the look and prevents the warm, deep shades from making the eye look small. Press it into the inner corner with your fingertip for maximum adherence.
Eyeliner (Optional)
A thin line of warm brown or burgundy eyeliner along the upper lash line adds definition without the harshness of black. If you’re using this look for a night out, a dark brown wing extends the warm drama. For daytime, skip liner entirely — the depth from the burgundy outer V provides enough definition.
Troubleshooting Common Sunset Look Problems
”My colors look muddy, not like a gradient”
You’re over-blending. Each shade should be distinct in its zone — yellow up top, orange in the crease, red in the outer crease, burgundy in the outer V. Blend only the edges where two shades meet, not across the entire lid. Use a clean brush for each transition.
”The red and orange look the same”
You need more contrast between your shade choices. Pick an orange that’s noticeably lighter and warmer than your red. If your orange leans too red, the two shades will merge. Consider using a peach-orange for more separation.
”My yellow doesn’t show up”
This is common on medium-to-deep skin tones. Use a white or light base underneath the yellow — a thin layer of white concealer on the area where the yellow will go makes it pop visibly. Or switch to a soft warm peach as your lightest shade instead of yellow.
”The shimmer keeps falling into my matte gradient”
Apply your matte gradient completely first, then the shimmer. Tap off any excess shimmer from your brush or finger before pressing it onto the lid. If fallout still occurs, hold a tissue under your eye during shimmer application and sweep away any particles before they set.
Sunset Variations to Try
- Soft Sunset: Replace all matte shades with softer versions — peach instead of orange, dusty rose instead of red, warm brown instead of burgundy. Same technique, more wearable intensity.
- Tropical Sunset: Add a pop of hot pink between the orange and red zones. This creates a more vivid, editorial gradient.
- Winter Sunset: Use cool-toned pinks and mauves instead of warm oranges and reds, with a silver shimmer instead of gold. Not a traditional sunset, but captures the cooler, pinker winter sky beautifully.
Get weekly eye care & beauty tips
Expert-researched guides delivered to your inbox. No spam, ever.
Frequently Asked Questions
What colors do I need for a sunset eyeshadow look?
A minimum of four shades: a warm yellow (lightest), a warm orange, a warm red or cranberry, and a deep burgundy or dark warm brown (deepest). Adding a gold shimmer for the center lid makes the look more dimensional. The key is that every shade should be warm-toned — cool pinks or cool reds will break the sunset gradient.
Is the sunset eye look hard for beginners?
It's intermediate-level. The technique itself is standard crease-and-blend, but working with warm reds and oranges requires comfort with bold color placement. If you can do a basic transition-and-crease look with neutral browns, you can do this — you're using the same motions with brighter colors. Start with a muted version using peach, terracotta, and warm brown to build confidence.
Why does my red eyeshadow look patchy in the sunset look?
Red pigments are notoriously difficult to formulate smoothly. Fix patchiness by: (1) using a warm orange transition shade underneath the red — this gives the red something to blend into; (2) applying red with a smaller, firmer brush in patting motions rather than blending motions; and (3) building intensity with 3-4 thin layers rather than one heavy application. A sticky base like concealer or glitter primer also helps red shadow adhere more evenly.
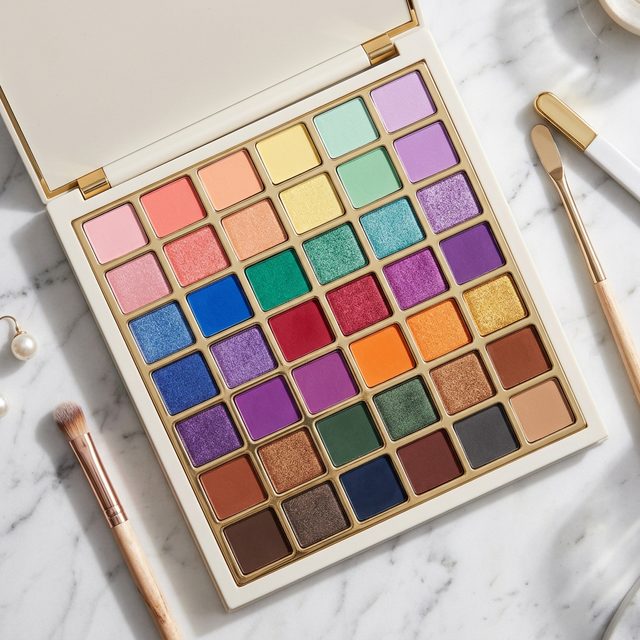
What eyeshadow palette is best for a sunset look?
The best palettes for sunset looks include the Anastasia Beverly Hills Modern Renaissance (excellent warm tones from yellow through red), the Morphe 35O (a large, affordable warm palette), and the ColourPop Going Coconuts or California Love palettes. Any palette with warm yellows, oranges, reds, and browns in the same color story will work.
Can I do a sunset eye look on dark skin?
Absolutely — sunset looks are stunning on deeper skin tones because the warm pigments show up richly without looking washed out. Use highly pigmented formulas (Juvia's Place palettes are excellent for this) and apply the yellow shade with intention — it may need an extra layer to show up against deeper skin, but the resulting glow is worth the extra step.